Matthew 6: 10
"Thy kingdom come, Thy will be done on earth, as it is in heaven."

Search
Close this search box.

Clothing Manufacturing

garment sample

Garment Sample: 12 Types of Garment Samples You Should Know for Apparel Production in 2024

Garment sample is one of the most basic and important terms in a clothing line especially when you want to manufacture garments for your clothing business.  Even though clothing manufacture is not a particularly difficult procedure in general, there are several stages that you must follow carefully before garments we can send out for production. Each of these steps includes a certain amount of sample preparation, testing, and altering.  There are a few different approaches to garment sampling, and it’s important to know and understand them all so you can figure out which one is best for your production needs. A garment sample is a small piece of fabric or cloth that we used to illustrate a larger total. A swatch is a small sample that we have taken from existing cloth. Whereas a strike-off is a larger sample that we prepared as a trial to evaluate print production procedures. We use lab dip for plain-dyed fabrics, while a handloom that we used for yarn-dyed fabrics such as stripes and checks.  Swatches are an important element of the design process since they allow designers to demonstrate the sort of fabric to use, as well as how colors, different materials, and trimmings would seem in real life, before going to the expense of creating a whole design. Many swatches of a textile manufacturer’s materials we can combine into a single sample book. It is only to show a wide range of available designs in numerous colors to potential customers without the need to have many rolls of fabric on hand.  Three Stages of Garment Sampling There are normally three stages to developing samples with your factories. The first collection of samples refers to the design process. It comprises everything from concept through pattern creation. The second sample set that we have used in the evaluation phase is to finalize garment fit, estimate costings, and order quantities, among other things. Finally, after the collection we completed and sent to production, you will need to double-check samples to confirm the batch’s quality and consistency. These samples are from the quality assurance phase. If not all, at least the majority of these samples require you to provide a high-quality product that will not only delight your customers but also help your company compete in today’s extremely competitive market. We’ve included all you need to know about garment samples right here!  Types of Garment Samples Mock-up The first interpretation of a designer’s idea is a muslin sample. Sometimes an idea will not transfer very well on paper as it will on fabric. Which is where a mock-up becomes useful. It doesn’t need trimming, and its main purpose is to see if the garment is wearable. Because not every design needs a mock-up, not every designer or manufacturer uses these types of samples. Proto or Development Sample The proto sample kickstarts the entire manufacturing process. Factories either follow the original sketch or the designer’s tech kit. The goal is to only look at the style and design aesthetics, therefore it doesn’t have to build to the exact specifications. Depending on availability, any fabric and trim with a similar weight we can utilize. We make three prototype samples: two for the brand/designer’s reference and one for the factory’s reference. Digital Garment Sample A digital sample is a 3D software model of the garment that allows the fit and fall of the garment that we can visualize in both stillness and motion. However, this technology’s limitations may include a difficult period of adjustment and a proper cost-benefit. However, if firms can overcome this, 3D may drastically reduce the cost of sample production and the time it takes for designers and factories to approve designs. Fit Sample We manufactured Fit samples in accordance with the sizing required by the brand to ensure the proper fit and fall of the clothing. To pass the fit evaluation, the measurements and construction must be accurate and correct. The fit sample that constructed from the same fabric as the final design. Numerous alterations may require before we accomplish the correct fit. You simply need to include sample size specifications in your tech pack at this point. Size Set Sample Following the approval of the fit sample, the base pattern for each size we must grade. So that samples for the whole size range we can make. Three samples of each size that we prepared using the fabric and finishings specified for the final product in a size set sampling. When the brand approves the factories, bulk production can begin. In your tech packs, including the exact specifications for your complete size range.  Salesman Sample The salesman samples, also known as SMS, are samples that we utilized in the marketing and promotion of a product line. We created them in the specified basic sizes with the final fabrics and finishing touches. They typically display them in retail stores or at trade exhibitions in order to generate orders from specific retail channels.  GPT Sample The GPT sample is a production sample delivered for the “Garment Performance Test”. They use these samples for a set of tests that a company wants to run before going into production with the styles. Seam strength, seam slippage, colorfastness, and wash fastness are some of the tests that can be performed. Pre-production Sample A pre-production sample is the first sample that we produced on the factory’s real production line. We make it by using the real fabrics used in the design. We finished it according to the order’s measurements, embroidery, and washes. It’s a factory test, and they can only move forward with mass production once they get authorization from the brand.  Sealed Sample After the brand approves the PP sample, we seal it to avoid factory tampering. It is now the standard for bulk manufacturing. Depending on the brand’s approval or rejection, they’re also known as gold-seal samples or red-seal samples.  TOP (Top of Production) Sample Following the approval of the PP Sample, which signifies the commencement of

Garment Sample: 12 Types of Garment Samples You Should Know for Apparel Production in 2024 Read More »

Textile Labeling: 5 Most Important Things Regarding Textile Labeling In 2024

While starting a new textile business, textile labeling is most important. After finishing all your production processes you can not move ahead without completing textile labeling. Especially if you are doing your business globally, you will have to know all the details regarding textile labeling.  Today we will discuss everything that you need to know about textile labeling.  Now let’s start with textile products! What Is A Textile Product?  What Is Labeling? When textile products are put on the market for production or commercial purposes, they must be labeled or marked. Labeling or marking is replaced by supporting business documents when these products are not offered for sale to the end consumer or when they are delivered in response to a State order. This business documentation must include the names, descriptions, and specifics of the textile fiber content. They must have stated on products that are for sale to the general public. Information other than that required by this Directive, with the exception of trademarks has to keep separate. Member states have the option of requiring that the Directive’s labeling and marking have to do in their native language. A textile product made up of two or more components with differing compositions must have a label that specifies the fiber content of each component.  The Directive establishes precise standards for the labeling of the following items: The Directive makes provision for derogations for the labeling of certain textile products. A designer must consider the needs of the target market, and the final product should be safe. They must mention “Keep away from Children” on children’s nightwear The Complete Guide To Textile Labeling The last thing you want is for your collection to be confiscated by customs or for the cargo to be lost after all of your hard work and high investment of money that went into creating it. Yes! If your labeling isn’t set up properly, this could happen. But don’t worry, you will learn all the necessary things regarding textile labeling now.  The consequences might be disastrous. For example, if customs officials inspect an arriving shipment and find it mislabeled, they may seize it. Even if customs can only inspect a few shipments, other market surveillance authorities may pursue you weeks or months afterward. The last thing you want is to run out of items to sell. Retailers and marketplace platforms, such as Amazon.com, are also subject to similar checks. It’s important as a designer or importer to get clothes labels right so you don’t lose your entire supply. Label Information What to include? This is the information that you need to provide depending on the country where you sell: United States The requirements are really strict. You must use a particular type of care label symbols to sell your designs in the United States. European Union What About The Rest Of The World? The easiest method to learn about the labeling regulations for your target market is to contact the local authorities. When doing so, use this checklist to ensure you don’t forget anything important: Multiple Market Labels Labels can be created in such a way that they meet the requirements of multiple countries at the same time. Many brands deal with both US and European Union textile labeling requirements at the same time. All that we required is the creation of a label file including all of the necessary information for each country. Apparels created for the EU and the US, for example, must include the following: Originating country (i.e., Made in Vietnam) ASTM Labels for Care English as a Second Language Use the target market’s (EU) language. Composition of Fiber.  Language Some companies, such as Asos.com, produce labels in all of Europe’s major languages, including English, French, German, Spanish, and Italian. Format And Additional Information Most of the suppliers prefer label files in .ai or .eps format. However, you can use .jpg files as well. But make sure to also include the following: Never take the supplier’s word for it that they’ll ‘get it right. While some factories may have a basic awareness of labeling regulations in the main outside markets, such as the United States, Europe, and Japan, this should never be assumed. It is your responsibility to provide the factory with a ready-made label file that contains all of the relevant information.  Timing And Submission Of Labels To The Supplier Your tech pack includes label files. You can use Techpacker to upload these and include all of the extra labeling information that the supplier requires. Use the PDF maker feature to get everything in one file once the Techpack finishes and the label files we uploaded to Techpacker.  Just keep in mind to send the original files to the seller when needed. You can also add members of your production team to your Techpacker account and share the original files with them.  But hold on! There are a few more rules to be aware of.The rules for labeling are simply one piece of the puzzle. You should also double-check all applicable other requirements, such as REACH in the EU and Proposition 65 in California. You may also be required to issue a paper document or a product certificate. Textiles made of specific lightweight fabrics, for example, must comply with the FFA in the United States, and the importer must additionally issue a General Certificate of Conformity (GCC). Now, if you are looking for a manufacturing company that can manufacture all your desired, designer, and customized clothing with the proper textile labeling, you will surely be 100% satisfied working with the Beautiful connection group. They are one of the best women’s clothing manufacturers in the USA. 

Textile Labeling: 5 Most Important Things Regarding Textile Labeling In 2024 Read More »

Tech Pack

How to Make a Tech Pack for Fashion: The Ultimate Guidelines to Tech Packs in Fashion (2024)

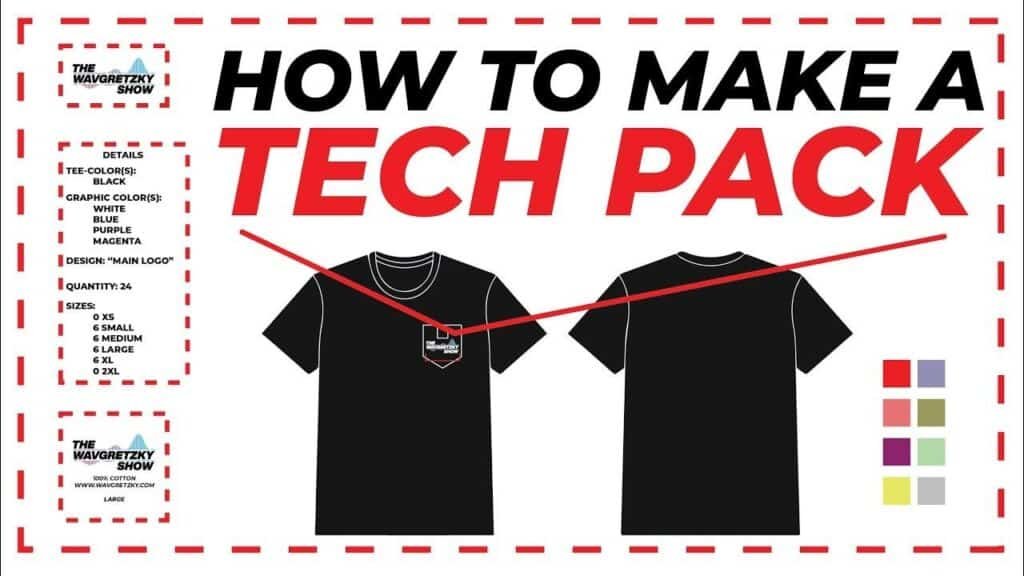
Do you know what a tech pack is and how to make a tech pack for fashion? Well, when you first heard the term “Tech pack”,  you might be asking what a tech pack is and how to make a tech pack? If you’re a new fashion designer who didn’t go to fashion school,  A technical designer creates a Tech Pack, which is a blueprint. It includes all of the parts and instructions a manufacturer needs to transform your concept into a finished product. Materials, gradings, seams, colors, measures, trim, labels, and so on all fall into this category. What is a Tech Pack in the Garment Industry?  A Tech Pack, also known as Specification Sheets, is a collection of documents generated by designers to describe their design to a manufacturer so that they can turn it into a finished garment. It acts as a blueprint for a finished garment, containing details such as detailed flat sketches of the design, materials to be utilized such as trims and labels, dimensions specifications, size-gradings, colors, and so on. Most contractors and factories will not take your orders unless you present a clear and complete Tech Pack when outsourcing garments. By precisely stating the desired parameters for the future product, a Tech Pack for fashion reduces the risk for both the manufacturer and the designer. A Tech Pack’s ultimate purpose is to reduce the number of samples produced and get a product to market faster. The Tech Pack also acts as a master record for tracking product development, including any comments, modifications, or last-minute changes. Why is a Tech Pack important? Here are a few reasons why Tech Packs are essential when producing any fashion product: It helps you save both time and money. You can receive error-free samples that reflect your original vision with the help of a thorough and easy-to-read Tech Pack. It aids in the accurate quotation of prices. The more information you include in your Tech Pack, the easier it will be for your factory to estimate how long it will take to make your product and, as a result, how much it will cost. Tech Packs aid in the improvement of fit quality When a manufacturer sends a fit sample, you can create a custom column called Fit Sheet to record the actual measurements. You can check whether these actual measurements are within tolerance by comparing them to the original measurements in the table. This allows you to make adjustments as needed and enhances the fit dramatically. It’s a reference point for quality control You’ll need to double-check each batch of samples for points of measurement, materials, and construction details. If any of them deviate from your specifications, you can notify your manufacturer, who will make the appropriate adjustments. It helps you collaborate in teams A Tech Pack turns into a collaborative environment in which designers, product developers, buyers, and quality control planners collaborate to build better products faster. What does a Tech Pack include? The content of a Tech Pack varies depending on the type of product and its design. However, here’s a list of the most common details included in a regular clothing Tech Pack. Fashion flat sketches Technical sketches (also known as fashion flats) show every design from various perspectives (front, back, side, and yes even inside). They assist your factory and pattern maker in visualizing how to build the initial prototype as near to your desired look as possible. That’s why they’re usually done in black and white and made with Adobe Illustrator. Before you begin your Tech Pack, make sure you have a comprehensive garment or accessory sketch. Here are a few pointers on how to make professional flat sketches for your Tech Pack: Include several different perspectives of your clothing. Include as many vantage points as possible, such as side views, inside labels, and other information, to help your manufacturer visualize how the garment should progress. Any specifics regarding the clothing that aren’t clear in these sketches need to write down. Diagrams with labeled arrows pointing out collars, plackets, cuffs, fastenings, bar tacks, and artwork placement are common examples. Provide as much information as possible. When it comes time to describe your idea to the factory, leaving parts of your sketch blank will only complicate things. This necessitates the placement of every seam, dart, stitch, and button. A solid line on a garment usually denotes a seam line, while a dashed line denotes stitching. If a detail in your Tech Pack isn’t visible on your sketch, don’t point to it! Maintain a straightforward approach.        Add details to your sketches, but don’t make them too complicated. To effectively describe your concept, avoid shading and utilize basic black and white sketches. Bill of materials The Bill of Materials (BOM) is a list of raw materials to manufacture and prepare a garment for shipment. When your company produces a physical product, you must obtain the necessary materials. Material sourcing is an important aspect of the manufacturing process. The materials you use have a significant impact on the quality of your finished product. The main fabric, secondary fabric (lining), thread, trims, closures, labels, and packaging are all included in a standard BOM table. A technical designer and product developers in the apparel business frequently generate a Bill of Materials. These designers collaborate closely, offering feedback to factories so that we can adjust the Tech Pack accordingly. A technical designer from a CAD (Computer-Aided Design) drawing usually creates a Bill of Materials. The following are three major reasons why a well-defined BOM table is critical: Garment measurement specs After you’ve defined the design and set up the drawings and materials page, you’ll need to add dimensions in your Tech Pack. The Dimensions specification sheet (also known as measurement specs) is a detailed description of the measurements of various components in a garment. Body length, chest, waist, hips, armhole, shoulder drop, and neck opening are some of the common measurement words included on every Measurement Sheet. However,

How to Make a Tech Pack for Fashion: The Ultimate Guidelines to Tech Packs in Fashion (2024) Read More »

how to paint on fabric

How to Paint on Fabrics : Pro Tips for Fabric Painting in 2024

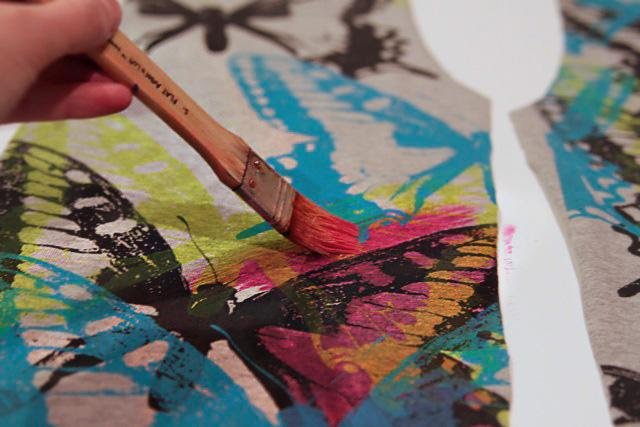
If you are someone who loves painted fabric, you may be willing to know how to paint on fabric. Fabric painting allows you to express yourself via art and creativity on the incredibly diverse medium of fabric and textiles. Fabric painting has a number of advantages. It lets you personalize clothing, wearable fabrics, upholstery fabric, and other crafts.  The majority of fabric painting is done with paint designed specifically for fabrics. Apart from that, there are just a few techniques that distinguish fabric painting from other types of paintings, such as those on paper or canvas. Nonetheless, there are a few things to keep in mind to help you preserve your fabric painting and discover your personal style.  GENERAL TIPS SUITABLE TEXTILES Woven, knitted, felt, terry fabric, silk, velvet, velveteen, corduroy, flannel, suede, leather, and most synthetics.  BEFORE YOU START DRYING TIME Depending on the surface, application, and humidity, it varies. In 5 to 2 hours, the paint will be dry enough to touch.  AFTERCARE TECHNIQUES AIRBRUSH/SPRAY APPLICATION MATERIALS Soft Body + Airbrush Medium / Acrylic Ink (straight from bottle)  DIRECTIONS BLOCK PRINTING MATERIALS Matte Varnish, Heavy Body Acrylic, Slow-Dri Gel Additive.  DIRECTIONS DON’T FORGET TO PREPARE YOUR FABRIC Before painting with most fabric paints, you must first prepare the fabric. This is a critical phase in the painting’s preservation. After all, you don’t want to spend all that time and effort painting a piece you enjoy just to have it peel off or fade.  The fabric paint you use will determine your preparations. This implies that the directions for that specific paint brand will be the finest source of information for the specific preparations you’ll need to undertake. The fabric must be pre-washed at all times. Chemicals and starches that may have remained in the fabric during manufacture. And transportation can be removed by pre-washing. While pre-washing, avoid using fabric softeners of any kind because they will reduce the fabric’s absorbency.  You’ll want to iron the fabric once it’s been washed and dried. Wrinkles will make painting your designs more challenging. Additionally, prepare the area by making a clean work area for yourself. Make sure you provide a barrier between the different layers of fabric when painting. Use a barrier between the two layers if the fabric has a front and back, such as a t-shirt, to protect the paint from soaking through. DO USE YOUR FAVORITE PAINTING BRUSHES AND TOOLS TO CREATE YOUR PREFERRED EFFECT Fabric paint is generally formulated similarly to acrylic paints, which means you have a number of options for tools and brushes.  While your standard acrylic brushes such as round and flat brushes would suffice, you may want to experiment with other tools as well. Rubber stamps, towels for texture, finger painting, palette knives, and any other tools that come to mind are all good options.  DON’T START PAINTING WITHOUT A PLAN When it comes to designing a final product, sketching a design ahead of time and even rehearsing on fabric scraps can help you avoid costly mistakes. It’s crucial to plan out your design and strategy ahead of time, just as with any other piece of art. DO USE GENERAL PAINTING TECHNIQUES Many of your typical painting techniques for bringing a pattern or shape to life can work with this paint, but it may be a little rougher or more absorbent than you’re used to. This means you can layer your paints, practice shading and highlighting to create depth, and add finer details within reason.  DON’T BE TOO SPARING WITH YOUR COLOR MIXES It’s usually a good idea to mix a lot of colors at once when mixing colors for fabric painting. This is because unprimed cloth is more likely to absorb paint than primed fabric. As a result, it’s a good idea to mix your paints freely so that you have enough of a color blend. It’s also a good idea to fill your brush with paint so your strokes don’t dry out too quickly.  DO PRACTICE AND EXPERIMENT There are many techniques for fabric painting, including free-painting acrylics. Different fabrics will accept, absorb, bleed, or react to your usual paint in different ways. Testing is a crucial step, considering that different formulas of fabric paint will react very differently to the same fabric. DON’T BE IMPATIENT WHEN THE PAINT IS DRYING If you’ve painted fabric while wet or if you have many layers of paint, this could take a while. Different fabric paints will have different requirements for finishing the painting process. Other kinds of fabric paint might require a cool rinse, once the paint has dried completely. You can get beautiful, long lasting, good quality and customized painted fabric from Beautiful connection group. Beautiful Connection group is one of the best clothing manufacturers in the USA who produce any kind of garment products for women. 

How to Paint on Fabrics : Pro Tips for Fabric Painting in 2024 Read More »

sewing pleats

Sewing Pleats : 10 Easy Steps of Sewing Pleats (2024)

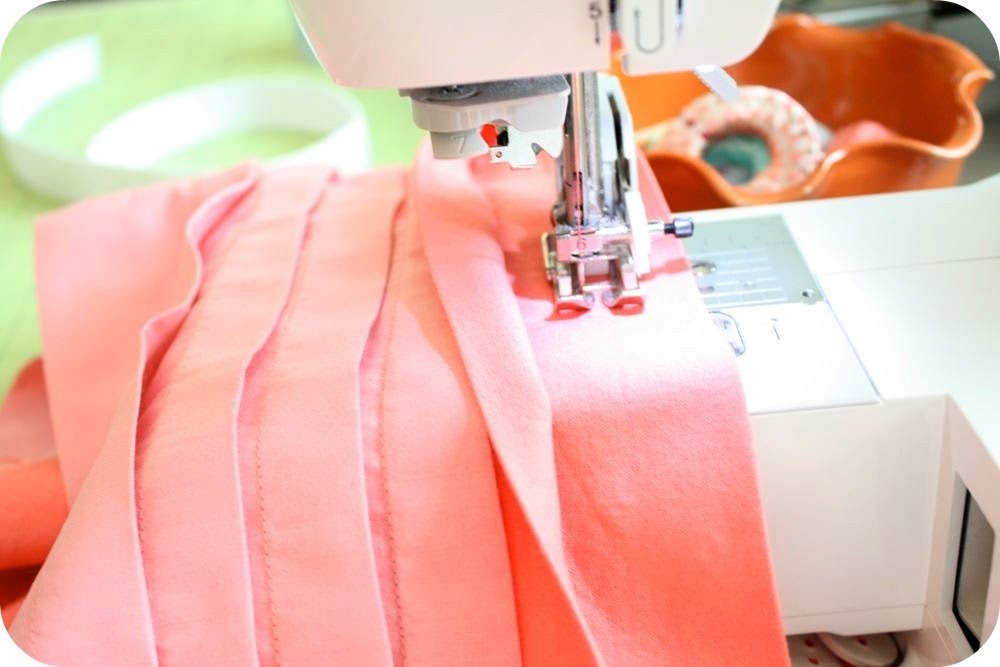
Sewing pleats exist in a variety of shapes and sizes, but sewing pleats always have the same basic structure and design. Pleats, which are frequently used as design features, have a particular effect on the fullness of clothes. Pleats are simple folds that minimize the width of your cloth while still allowing it to move. Consider a traditional pleated skirt that the pleats give the skirt some soft structure while still allowing it to bellow out as you walk.  Pleat Anatomy Pleats have some fascinating jargon that helps you grasp their anatomy, as you’ll see in the movie. Here are a few terms you can start with. Firstly pleat depth is the distance between the pleat’s exterior and inside folds. Secondly pleat underlay equals the depth of the pleat multiplied by two. Thirdly pleat spacing refers to the space between each pleat. Types of Pleats Pleats come in a variety of shapes and sizes, but the five most prevalent forms are described in the video.  Knife pleats have all of the outside folds facing in the same direction. Pintucks are a type of knife pleat; see the section below for additional information on tucks vs. pleats. Accordion pleats are a version of the knife pleat, but with considerably tighter placement—and smaller pleat spacing!  Box pleats have the exterior folds facing in opposite directions, giving them a box-like form.  Inverted box pleats have the features of outer folds that face one another, similar to a box pleat.  Knife pleats are similar to radiating pleats, but they radiate out from a single point.  Have Fun with Pleats Add Box Pleats Box pleats are a timeless style. One per garment would suffice, or you can construct a sequence of box pleats on your skirt or dress. The two folds of a box pleat face away from each other, creating a box-like pleat. This pleat is simple to make, and if your design doesn’t include one, you can easily add one yourself. The Sorbetto top has a classic box pleat, while the Brooklyn skirt has an inverted box pleat.  Create Tucks To avoid offending sewing language purists, the distinction between pleats and tucks is minor and can cause some confusion. Pleats are secured on the top—or the bottom, or both, depending on the style of pleat—but they still have the ability to open. Tucks can be pleated or darted in appearance. Tucks are pleated folds that are completely or nearly completely fastened. A tuck is created by sewing down a portion of the length of a pleat.  Pintucks are a playful, ornamental detail that we can add to any clothing. We show you how to make pintucks on the yoke of a dress in this tutorial from issue 21 of Seamwork. For a textured appearance, pintucks can be placed in pockets, shoulders, and other parts of a fabric.  Tip No. 1 – Pleat does not work with all fabrics  Which fabrics are ideal for pleats?  Pleated fabrics do not look well on anyone. Natural fibers such as cotton, linen, and silk are ideal for pleating. Thin synthetic fabrics (polyester, nylon) may not hold the pleats unless you use a lot of heat. Pleating is difficult with thin sheer and semi-sheer textiles like chiffon unless they are machine pleated.  Pleating chequered and striped fabrics, especially those with symmetrical lines, is the simplest method. These repetitive lines on the fabric serve as instructions for making even pleats by precisely folding the fabric. Some textiles are better for gentle folds (wool), while others are better for crisp pleats (silk) (linen). Pleats can be constructed with bias cut fabric when hanging fabric over a dress form to make a pattern for a very unique draped effect. Tip No. 2 –  Get the right tools for pleating You’ll need a set of marking tools, a set of measurement instruments, and plenty of cloth. Pins are also required to keep the pleat folds in place. Pleating pins are little, sharp pins that are used for, you guessed it, pleating. You may want to stitch the pleats after pinning them to keep them more tight, which will require a hand sewing needle and thread. Pleaters use pleating boards to make clean pleats. This can be purchased and the pleats steam pressed into place. Cut out cardboard pieces of the same size and use them to press the pleats as an alternative.  Tip No 3 – Marking the pleats Pleats are marked with a fold line as well as a placement line. The fold line and the placement line must be parallel. Throughout, we have to maintain this. Pleats are frequently marked on the garment’s right side. However, marking on the reverse may be necessary at times.  Outside of the seam line, use small scissors to snip mark the pleat lines on the seam allowance. This is more visible than chalked-on marks. Crease the fabric along the lines you’ve drawn.  If you don’t want to mark the cloth and want to construct straight pleats, you’ll have to use basting stitches to mark the vertical lines.  We have to place pins vertically along each pleat to keep the folds in place if utilizing pins. Tip No. 4 – Pressing is very important in making neat pleats If you want a soft look, merely press the joining region; if you want crisp pleats, press the entire pleat. This will create the appropriate creases to guide you during sewing. Check that the outside folds and placement lines are staying in the same alignment. Make sure all of the pleats are the same width. You can dampen the fabric and press it in place for clean pleats.  Tip No. 5 –  Baste stitch the folds in place  You can stitch along both the top and bottom edges. Taping the pleats down is an alternative to basting sewing.  Sew along the tops of the pleats, making sure they are not disturbed. Only when all of the sewing has been completed are the basting stitches removed.  Tip

Sewing Pleats : 10 Easy Steps of Sewing Pleats (2024) Read More »

how to make fabrics

How to Make Fabrics: The Basics of Making Fabric (2024)

Have you ever wondered how to make fabrics of the cloth you are wearing?  Many individuals underestimate the importance of cloth in their lives. Sure, we all put on clothes on a daily basis, and many of us do so without hesitation. But have you ever considered how many significant events and everyday occurrences in your life are linked to a piece of fabric?  Fabric influences not only how we live but also how we feel, from your childhoo­d blanket to your wedding gown and your beloved worn-out trousers. A familiar piece of clothing’s appearance, feel, and even aroma might evoke memories of a first love, a special vacation, or simply a sense of security. Fabric and clothes are also influencing religious and societal ideas. Since the dawn of time, a person’s clothing has been able to reveal their socioeconomic level in an instant. Thousands of years ago, simply being able to buy clothing at all was a sign of riches. Today, we place the highest value on designer labels, but thousands of years ago, just being able to afford clothing was a show of wealth. From the bright yellow robes of Buddhist monks to the heavy black burkas worn by many Muslim women, to the colorful hand-spun clothing associated with ancient African religions, many religious groups are now readily connected with various types of fabric and apparel. Fabric, above all, serves a functional purpose. It shields us from the elements, including cold and heat, rain, and direct sunlight. When we sleep, we wrap ourselves in blankets, and when we walk, we use woven rugs to cushion our steps. Many people don’t think about how cloth is made or how to make fabrics for the cloth, despite the fact that it plays such an important role in our daily lives. The process of making cloth from natural and synthetic fibers is far more sophisticated than most people realize. We’ll study how fabric manufacturers separate fabric fibers and turn into garments and textiles. We will be familiar with making fabrics in this post.  The Raw Materials There are three types of basic fabric materials – from natural plant sources, derived from animals, and man-made.   To comprehend how fabric is made, we must first discover how these resources are collected or manufactured, as well as what needs to be done before making fabric. Cotton – This material is gathered by machine from the cotton plant and then transferred to a cotton processing plant. The material is next passed through a succession of rollers, which extract the seeds, remove any debris or impurities, and split the material into bales. Flax – Linen is made from the flax plant. In preparation for fabric manufacture, the plants are taken from the ground by hand, flattened to remove seeds, then combed through to separate the fibers.  Silk is produced by harvesting a silkworm’s cocoon, which is lined with a thin layer of silk filament that is softened and then removed as a single thread. Because single threads are too thin to deal with. This thread will be twisted together with numerous others before moving on to the next step of production.  Wool – A sheep’s coat is shorn. And the fleece is washed and carded, or rearranged into a shape that makes it easier to turn into fabric. It makes a square mat of fibers and can be done by hand or machine. Rayon – is a popular alternative to silk from the late 1800s. It’s manufactured by putting cellulose through a spinneret machine. This machine looks like a showerhead and turns liquid cellulose into a solid filament. Cellulose comes from plants and is a basic sugar polymer. Nylon – Nylon is often regarded as the world’s first man-made fiber. While nylon is made in the same way that rayon is, the materials used to make it are not derived from plants. Nylon is a synthetic fiber manufactured from coal and petroleum by-products, as well as water and air.  Polyester – In terms of strength and versatility, polyester is a step up from nylon and rayon. Polyester is also created by driving chemicals through a spinneret, but the ingredients are sourced from alcohols.  The Manufacturing Process of Fabric Fabric manufacturing can be broken down into three parts. The manufacture of yarn is the initial step in the fabric-making process. Raw materials are gathered and processed here, and raw fibers are converted into yarn and threads. Spinning the fibers does this. Spinning can be done by hand, but it is a tedious and time-consuming procedure. The great bulk of spinning nowadays is done on a spinning wheel. The fibers are dragged across the wheel and collected on a cylindrical item known as a bobbin as it spins. The spun fibers are held in the bobbin and are now linked into a long length of thread or yarn. The bobbins will then be moved to a different machine, where the yarn will continue on its way to become cloth.  After the raw materials have been transformed into yarn, the next step in the manufacturing process involves sewing the individual strands together to make fabric. Weaving is the term for the process of connecting yarns together. Weaving is done with two sets of yarn on a machine called a loom. The warp set is the initial set, which is tautly strung across a metal frame. The second, known as the weft, is made up of one thread per metal rod. The loom is controlled by a computer program, which instructs the weft on how to weave the fabric.  The fabric is removed from the loom after weaving and is now ready for the final step : processing. Greige fabric is new-off-the-loom fabric that doesn’t look like the crisp white sheets or garments you’re used to. It’s discolored and contaminated with contaminants, seed fragments, and detritus. It must be cleaned before it can be turned into functional textiles. To begin, it is bleached to remove the base color.

How to Make Fabrics: The Basics of Making Fabric (2024) Read More »